서버를 한 대 받아서 git 프로젝트를 설치했다.
그런데 매번 pull 할 때마다 계정을 넣고 있었다.
그래서 로그인 없이 git 프로젝트 가져오는 세팅을 하기로 했다.
1. RSA 키 생성하기
2. Github에 Deploy Key 등록
3. 확인하기
4. https 저장소를 ssh로 바꾸기
1. RSA 키 생성하기
키 생성은 간단하다.
$ ssh-keygen -t rsa-t : 암호화 타입을 지정한다. 여기서는 RSA로 한다.
파일이 잘 만들어졌다면 아래와 같이 뜰 것이다. 그렇다면 2번 단계로 넘어가자.
Generating public/private rsa key pair.
Enter file in which to save the key (/home/webapp/.ssh/id_rsa): /path/to/file
Created directory '/home/webapp/.ssh'.
Enter passphrase (empty for no passphrase): [자동로그인을 위해 공백으로 둔다.]
Enter same passphrase again: [자동로그인을 위해 공백으로 둔다.]
Your identification has been saved in /path/to/file.
...
하지만 나는 그렇지 못했다.
$ ssh-keygen -t rsa
Generating public/private rsa key pair.
Enter file in which to save the key (/root/.ssh/id_rsa): /path/to/file
Enter passphrase (empty for no passphrase):
Enter same passphrase again:
Saving key "/path/to/file" failed: No such file or directory
찾아보니 권한 문제였다.
그건 아래 포스트 방법으로 해결했다.
https://really121.tistory.com/2
해당 서버에 root로 들어갔기 때문에 webapp로 계정전환을 한다.
그 후 다시 실행했더니 파일이 생성됐다.
$ ssh-keygen -t rsa2. Github에 Deploy Key 등록
Github의 프로젝트 화면에서 Settings를 클릭한다.

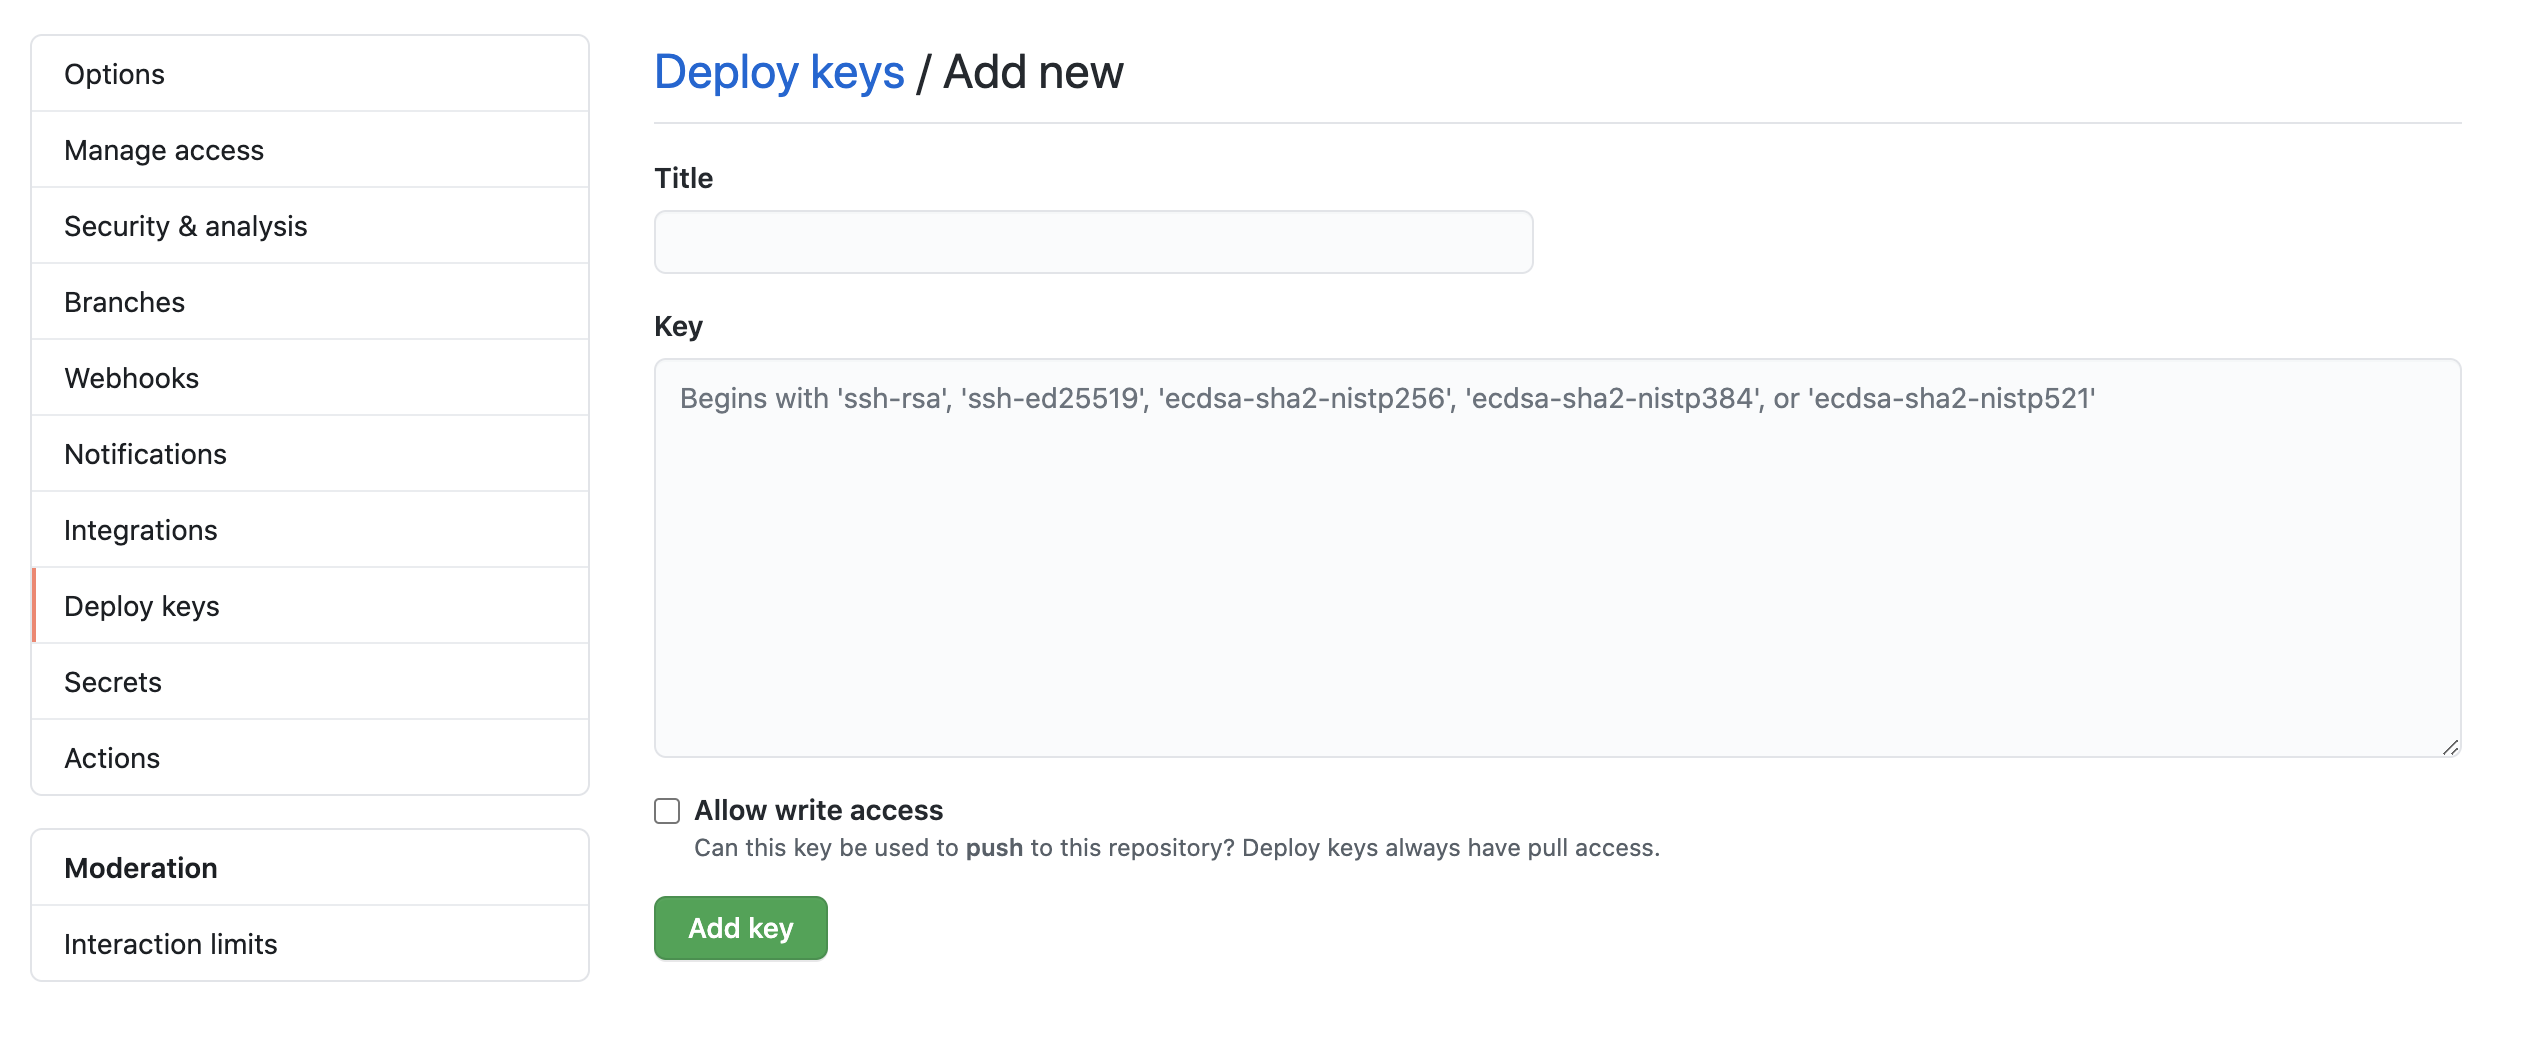
그리고 Deploy keys 메뉴를 클릭 후 좌측 상단에 Add deploy key를 클릭 후 아까 만들어둔 RSA의 퍼블릭키(파일이름을 따로 만들지 않았다면 .ssh/id_rsa.pub)를 입력한다.


해당 서버는 배포용이어서 Allow write access를 체크하지 않았다.
3. 확인하기
$ ssh -T git@github.com이렇게 입력하면 아래와 같이 나온다.
> The authenticity of host 'github.com (xx.xx.xxx.xxx)' can't be established.
> RSA key fingerprint is 16:27:ac:a5:76:28:2d:36:63:1b:56:4d:eb:df:a6:48.
> Are you sure you want to continue connecting (yes/no)?
또는
> The authenticity of host 'github.com (IP ADDRESS)' can't be established.
> RSA key fingerprint is SHA256:nThbg6kXUpJWGl7E1IGOCspRomTxdCARLviKw6E5SY8.
> Are you sure you want to continue connecting (yes/no)?
그러면 yes라고 입력.
잘 됐다면 아래와 같이 나온다!
> Hi username! You've successfully authenticated, but GitHub does not
> provide shell access.
성공!
아니라면 아래 링크에서 원인을 파악해보자.
https://docs.github.com/en/github/authenticating-to-github/error-permission-denied-publickey
4. https 저장소를 ssh로 바꾸기
만약에 기존 https 저장소 주소를 사용하고 있었다면 ssh로 바꾸자.
주소 바꾸는 방법은 아래의 포스트를 참고하면 된다.
https://really121.tistory.com/3
끝!
'개발노트' 카테고리의 다른 글
| form 태그의 method (0) | 2020.12.01 |
|---|---|
| ruby의 send 함수 (0) | 2020.12.01 |
| [ruby]callback과 filter를 거치지 않고 데이터의 값 업데이트 하기 (0) | 2020.08.09 |
| [ruby]ActiveRecord의 delete와 destory의 차이 (0) | 2020.08.09 |
| Linux에서 다른 계정으로 전환하기 (0) | 2020.08.09 |

댓글